
Table of Contents
- Document Damage Promptly After the Hailstorm
- Create a Hail Damage Photo Documentation Strategy
- Build Your Hail Damage Insurance Claim Checklist
- Organize Your Hail Damage Report Template
- Understand Your Hail Damage Claim Timeline
- Handle Disputed or Underpaid Claims
- Common Documentation Mistakes to Avoid
- Next Steps After Documentation
- Frequently Asked Questions
Last Updated: October 17, 2026
Document Damage Promptly After the Hailstorm
The first 24 to 48 hours after a hailstorm are critical. This is when you should learn how to document hail damage for insurance purposes, before cleanup, repairs, or further weather exposure.
Many owners wait days or weeks to start. By then, dirt has settled, rain has obscured details, or temporary repairs have complicated the claim.
Take photos and video immediately, note the storm date and location, and report the loss to your insurer. These steps prevent disputes later.
Create a Hail Damage Photo Documentation Strategy
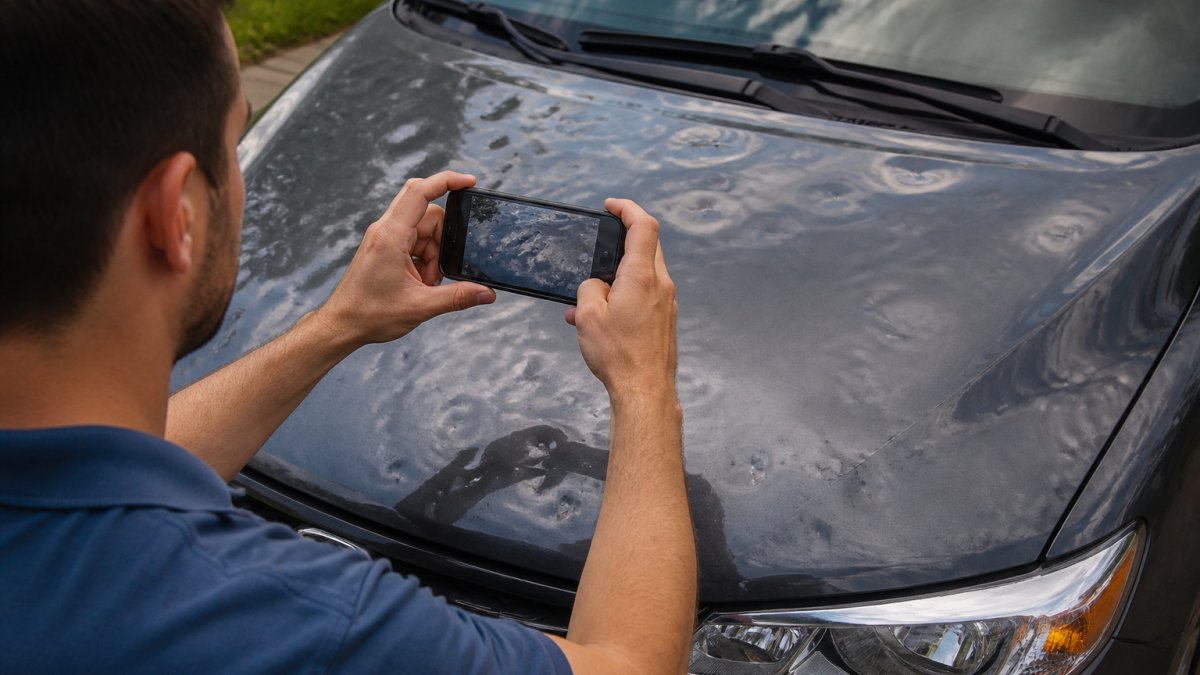
Photos and video are the backbone of a hail damage insurance claim, but volume alone doesn't win. A repeatable shot sequence, consistent scale references, and untouched original files separate a strong claim file from a weak one, adjusters look for context, scale, and continuity.
Equipment You'll Need
You don't need professional gear, a modern smartphone captures enough detail for an insurance review. Have these ready:
- Smartphone with a charged battery and free storage (aim for at least 2 GB free)
- A coin, a ruler, or a tape measure for scale
- A flashlight or headlamp for shaded areas and interior shots
Optional: a backup camera and a small tripod for steady close-ups.
The Wide, Medium, Close-Up Shot Sequence
Work through every damaged area in the same order every time. Consistency makes your file easy to follow and hard to dispute.
- Establishing wide shot. Stand back far enough to show the whole vehicle, the surrounding area, and any visible hail on the ground or nearby surfaces. This anchors the scene.
- Medium shot. Move to roughly 6 to 10 feet and frame one panel or area at a time, hood, roof line, each door, each fender, trunk lid, and glass.
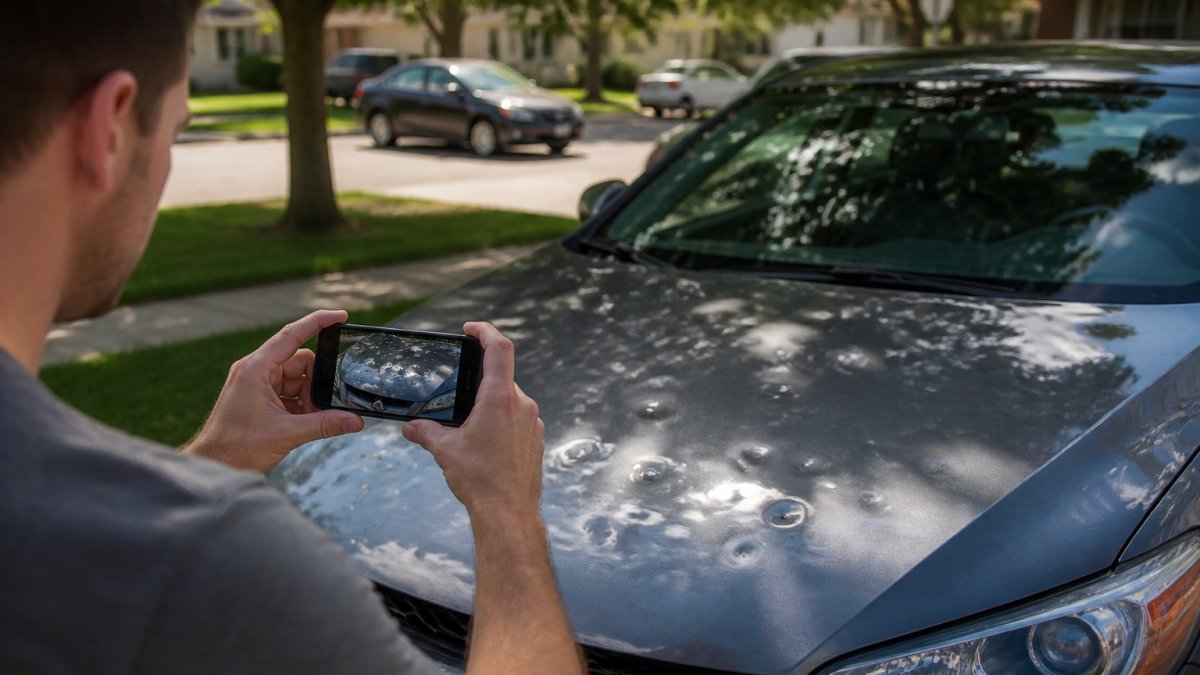
- Close-up with scale. Place a coin or ruler next to each dent, crack, or chip and shoot from about 12 to 18 inches. The scale reference lets an adjuster judge size without guessing.
- Angle variation. Shoot each damaged area straight on and at a low oblique angle. Oblique light reveals shallow dents that disappear in flat, head-on light.
- Continuity shot. Include one photo that shows two adjacent panels together so the adjuster can map damage across seams.
A normal file runs 40 to 80 images per vehicle. Adjusters review every frame, and missing panels are a common reason for supplements later.
Video Walkaround
A two- to four-minute video walkaround complements stills. Narrate the date, storm, vehicle, and VIN, then walk clockwise calling out each damaged area. Video is especially useful for showing dent patterns across a roofline that stills flatten. Consistent documentation techniques also prove invaluable when spotting storm damage on your residence, ensuring that you maintain a comprehensive record of every impact point.
Timestamps, Metadata, and Original Files
- Leave your phone's automatic date, time, and location tagging on. That metadata is evidence.
- Do not edit, crop, filter, or resize originals. Edited files lose credibility and can be challenged.
- Copy originals to a computer or cloud folder before you text or email any of them, messaging apps often compress images.
Build Your Hail Damage Insurance Claim Checklist
A structured approach prevents missed details. Use this checklist to understand how to document hail damage for insurance and capture everything your insurer needs to process your claim quickly.
What to Record at the Scene
Document these specific items at the time of the hailstorm damage:
- Storm date and exact time it occurred
- Storm location (address or cross streets)
- Hail size, if you observed it (golf ball, marble, pea-sized)
This context shows the adjuster the storm's severity and corroborates your damage report.
Interior and Secondary Damage Assessment
Don't limit your documentation to the exterior. Check inside your vehicle for water intrusion or other damage from the hailstorm:
- Interior headliner damage or water stains
- Wet carpeting or standing water
- Damaged dashboard or trim pieces
Photograph interior damage clearly. Water intrusion is often missed initially but can lead to mold or electrical problems, so document it now.
Organize Your Hail Damage Report Template
Disorganized documentation slows down claim processing. Create a structured record that your insurance company can easily follow.
Written Inventory Structure
Write down a detailed inventory of all visible damage. Use this format:
- Vehicle make, model, and year
- VIN (Vehicle Identification Number)
- Mileage at time of damage
This inventory ties your photos together so the adjuster can follow your documentation logically instead of sorting through random images.
Digital Evidence Preservation
Keep photos and video organized and backed up:
- Create a folder on your phone labeled with the storm date
- Back up all images to cloud storage (Google Photos, iCloud, OneDrive)
- Export copies to your computer
- Keep the original files with metadata intact
- Create a backup copy on an external hard drive
Cloud backup protects evidence if your phone is lost or damaged, and multiple copies guard against accidental deletion.
Understand Your Hail Damage Claim Timeline
Hail claims are governed by your policy and state insurance rules, and both vary. Don't memorize a number, know where your deadlines and limits live and build a timeline you can defend.
Where Your Deadlines Actually Live
Three documents control your timeline:
- The policy declarations page, shows your deductible, coverage limits, and any endorsements.
- The duties-after-loss section, typically requires prompt notice, reasonable protection of the property from further damage, and cooperation with the investigation. "Prompt" is rarely defined in days, which is why documenting the same day matters.
- Your state's insurance department, publishes consumer guides and, in many states, claim-handling regulations that set outer limits on acknowledgment and payment timelines.
Read the duties-after-loss section before you call, noting proof-of-loss forms, submission deadlines, and inspection requirements.
Deductibles, Exclusions, and Matching Rules
- Deductible. Auto policies typically use a flat dollar deductible; some homeowners policies use a percentage deductible tied to the dwelling limit. Confirm which applies before you assume a repair is covered.
- Exclusions. Wear and tear, pre-existing damage, and cosmetic-only damage are common exclusions or limitations. Read the exclusions section and note anything that could apply to your vehicle's age or condition.
- Matching rules. If only part of a panel or a paired component is damaged, some policies and some state rules address whether the insurer must match undamaged portions. Ask your adjuster directly how matching is handled on your claim.
A Practical Claim Timeline
- Day 0. Document damage, protect the vehicle from further weather, and notify your insurer.
- Days 1-3. Receive your claim number and adjuster contact. Submit photos, video, and your written inventory through the insurer's portal.
- Days 3-10. Schedule the inspection. Be present, walk the adjuster through your shot log, and ask for the scope of damage in writing.
- Days 7-21. Review the estimate line by line against your documentation. Request supplements for anything missed.
- Repair scheduling. Confirm the shop, parts availability, and rental coverage before authorizing work.
Timelines stretch when parts are backordered or storm volume is high. Ask your adjuster for a realistic estimate in writing.
Verify Before You Rely
Contact your state's Department of Insurance for the consumer guide and claim-handling rules that apply where you live. The National Association of Insurance Commissioners publishes state-by-state consumer resources and complaint processes. Use these to confirm deadlines, complaint windows, and any matching or appraisal rights before you accept a settlement.
Handle Disputed or Underpaid Claims
Sometimes the insurer's initial estimate doesn't match the actual repair cost. You have options.
If your claim is underpaid, request a detailed breakdown of what was covered and excluded, with a written explanation of their reasoning.
Get a second repair estimate from an independent shop.
Document any additional damage found during repairs, hail damage sometimes reveals underlying issues. Report it immediately with photos and shop notes.
If the dispute continues, contact your state's insurance commissioner or department. According to the National Association of Insurance Commissioners, most states have formal complaint processes for claim disputes.
Common Documentation Mistakes to Avoid
Avoiding these errors saves time and protects your claim.
Photographing only major damage. Small dents add up.
Forgetting to include the date and location. Photos without context are less valuable.
Taking photos in poor lighting. Evening light hides damage.
Failing to photograph the VIN and odometer. These details verify the vehicle and its condition.
Assuming the insurance adjuster will find all the damage. You know your vehicle best.
Next Steps After Documentation
Once documentation is complete, move forward with your claim.
Contact your insurance company with your claim number and the date of the hailstorm.
Schedule an inspection with the insurance adjuster if required by your policy. Bring your documentation to the appointment.
Get repair estimates from qualified shops. According to the American Automobile Association (AAA), using certified repair facilities helps ensure quality work and proper claim handling.
If you're in the Dallas-Fort Worth area or Scottsbluff, Nebraska, 888 PDR handles the entire hail damage insurance claim process for you.
Keep all documentation organized in one place, with digital copies and printouts of important documents.
Hail damage claims don't have to be stressful. Proper documentation from the start prevents delays, disputes, and underpaid settlements.
Frequently Asked Questions
What photos should I take to document hail damage?
Take wide shots showing the overall damage pattern across the vehicle, then close-ups of individual dents with clear detail of the impact. Include photos of the roof, hood, doors, and side panels. Capture dents from multiple angles and in natural daylight. If visible damage appears on windows, gutters, or siding, photograph those too. Include a timestamp or date stamp on photos when possible. Video footage panning across damage areas provides additional evidence. Avoid blurry or backlit images that obscure the hail damage details.
How long do I have to report hail damage to my insurance company?
Most homeowners and auto insurance policies require notification within a specific timeframe, typically 30 to 90 days, though some policies allow longer. Check your insurance policy documents for the exact deadline in your coverage. Report damage as soon as possible after the hailstorm to avoid claim denial due to late filing. Contact your insurance adjuster immediately after documenting the damage. Delayed reporting can complicate the claim process and may raise questions about whether damage is pre-existing or storm-related.
Can I document hail damage myself before an insurance inspection?
Yes. In fact, documenting damage immediately after the hailstorm strengthens your claim. Take photos, videos, and written notes while the damage is fresh and visible. Create a detailed inventory of all affected property, including vehicles, roof, gutters, windows, and siding. Record the storm date and location. Keep receipts for any temporary repairs you make to prevent further damage. Your documentation provides the insurance adjuster with clear evidence and helps prevent disputes over what damage occurred during the storm versus pre-existing wear.
What information should I record after a hailstorm?
Record the exact date and time of the hailstorm, the location where your vehicle was parked, and weather conditions. Document the size of hailstones if visible. Note any visible damage to the roof, gutters, siding, windows, and vehicles. Record your insurance policy number and contact information. Keep receipts for temporary repairs or protective measures. Write down the names and contact information of any witnesses. Save your insurance adjuster's name and claim number. Store all receipts, estimates, and correspondence with your insurer. This complete record prevents gaps in your claim documentation.